
CHKDSK or Check Disk is a built-in Windows utility checks the state of the hard drive and corrects any errors it finds, if possible. It can be useful for troubleshooting read errors, Bad sectors and other storage-related problems. Whenever we need to detect and fix file system or disk corruption, we run the built-in Windows Check Disk tool. The Check Disk utility or ChkDsk.exe checks file system errors, bad sectors, lost clusters, and so on. Here is how to run chkdsk utility on windows 10 and Fix Disk Drive Errors.
Run chkdsk utility on windows 10
You can run the Check disk Tool From disk Drive properties or through the command line. To Run Disk Check Utility first, open This PC -> Here select and right-click on System Drive -> Properties > Tools tab > Check. But Running Chkdsk Tool from Command is very Effective.
Command Line Check Disk
For this first open Command prompt as administrator, You Can do this by click on the start menu search type cmd, then right-click on Command prompt from search results and select run as administrator. Here on the Command Prompt, type the command “chkdsk” followed by a space, then the letter of the drive you wish to examine or repair. In our case, it’s internal drive “C.”
chkdsk

Simply running the CHKDSK command in Windows 10 will only display the disk’s status, and won’t fix any errors present on the volume. This will run Chkdsk in a Read-Only mode and display the status of the current drive. To tell CHKDSK to fix the drive, we need to give some Extra parameters.
CHKDSK extra parameters
Typing chkdsk /? and hitting Enter will give you its parameters or switches.
/f Fixes errors detected.
/r Identifies Bad Sectors and attempts recovery of information.
/v Displays list of every file in every directory, on FAT32. On NTFS, is displays the cleanup messages.
The following are valid on NTFS volumes only.
/c Skips the checking of cycles within the folder structure.
/I Performs a simpler check of index entries.
/x Forces the volume to dismount. Also invalidates all open file handles. This should be avoided in Desktop Editions of Windows, because of the possibility of data loss/corruption.
/l[:size] It changes the size of the file that logs NTFS transactions. This option too, like the above one, is intended for server administrators ONLY.
Do note that, when you boot to the Windows Recovery Environment, Only two switches may be available.
/p It performs an exhaustive check of the current disk
/r It repairs possible damage on the current disk.
The following switches work in Windows 10, Windows 8 on NTFS volumes only:
/scan Run the online scan
/forceofflinefix Bypass online repair and queue defects for offline repair. Needs to be used along with /scan.
/perf Perform the scan as fast as possible.
/spotfix Perform spot repair in offline mode.
/offlinescanandfix Run offline scan and perform fixes.
/sdcclean Garbage collection.
These switches are supported by Windows 10 on FAT/FAT32/exFAT volumes only:
/freeorphanedchains Free up any orphaned cluster chains
/markclean Mark the volume clean if no corruption is detected.

To tell CHKDSK to fix the drive, we need to give it parameters. After your drive letter, type the following parameters separated by a space each: “/f /r /x”.
The “/f” parameter tells CHKDSK to fix any errors it finds; “/r” tells it to locate the bad sectors on the drive and recover readable information; “/x” forces the drive to dismount before the process starts.
Command to Check Disk Errors
To summarize, the full command that should be typed into the Command Prompt is:
chkdsk [Drive:] [parameters]
In our example, it’s:
chkdsk C: /f /r /x
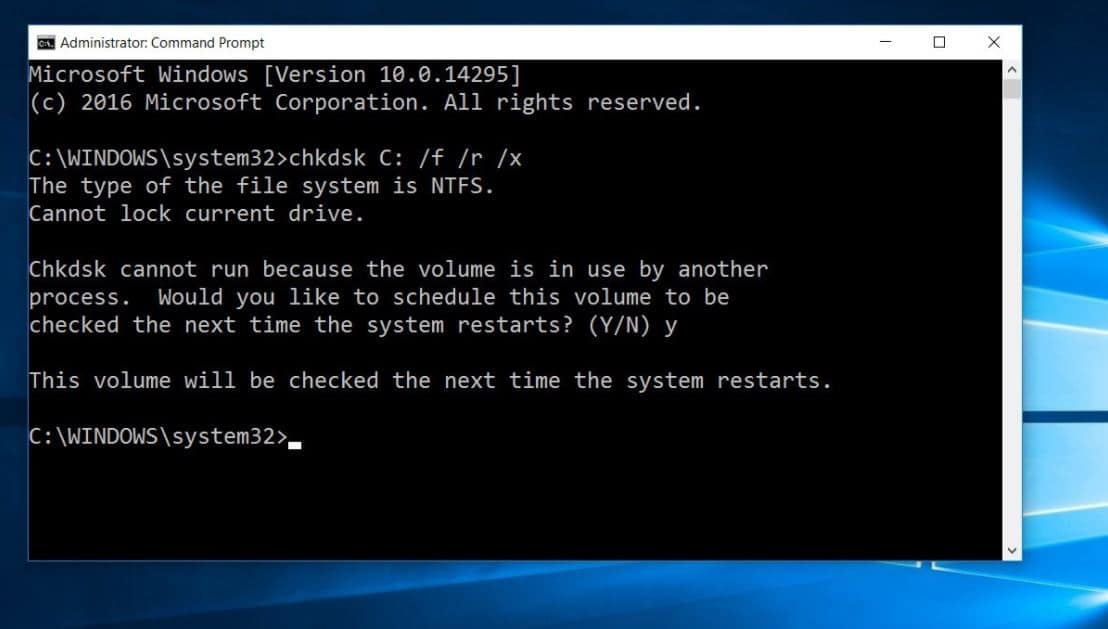
Note that CHKDSK needs to be able to lock the drive, meaning that it cannot be used to examine the system’s boot drive if the computer is in use. If your target drive is an external or non-boot internal disk, the CHKDSK process will begin as soon as we enter the command above. If, however, the target drive is a boot disk, the system will ask you if you’d like to run the command before the next boot. Type “yes” (or “y”), restart the computer, and the command will run before the operating system loads. This will scan the drive for Errors, Bad sectors if found any this will repair the same for you.

This scanning and repair process can take a long time, especially when performed on larger drives. Once it’s done, however, it will present a summary of results including total disk space, byte allocation, and, most importantly, any errors that were found and corrected.
Conclusion :
One word: You can use Command chkdsk c: /f /r /x to Scan And Fix Hard Drive Errors in Windows 10. I hope after reading this post you clear about CHKDSK Command, And how To use extra parameters to scan and repair disk Errors.